
This is the third and final installment of the AR15 Upper Receiver Group build series. In Part 1 we looked at parts, tools, and some other considerations. In Part 2 I documented the assembly process. Finally we’ll look at whether or not I assembled a working rifle and review some lessons learned.
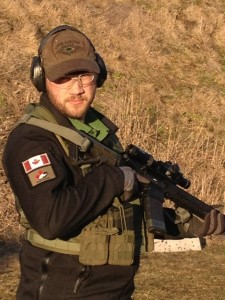
The author and the 11.5″ AR15 at a practice
Test Firing
At the end of Part 2 I explained the method for function testing the AR15. I’ve also moved the Vortex Viper PST 1-4×24 from my Stag upper to the new 11.5″ upper. I won’t go into detail about the process for mounting and zeroing a scope as the topic easily warrants it own article. The process I used for test firing was based on the SWAG (wikipedia link) method. An item that I did not include in Part 2 was checking headspace. Headspace is the distance from the bolt face to the point of contact with the chamber shoulder. To correctly check headspace 2 gauges, a “go” and a “no-go”, in the appropriate caliber should be used to validate the headspace. I used a reloaded round with no powder or primer to make sure it fit, but this is not the best way to check headspace. However it is a field expedient solution, and I was not willing to buy $80 gauges that I would use once.
Making It Go Bang
At my home range I set the rifle up on a bench at 25 yards and loaded a single round. It fired and cycled successfully. Problem signs I was looking for were:
- Hard Extractions
- Flatten Primers
- Primer Crater
- Pierced Primer
- Case Head Extrusion
Fortunately I found no issues with the first round. I loaded another magazine and checked each round as it was fired. With 11 rounds fired successfully I was satisfied that the rifle was operating safely.
Zeroing
After making sure the rifle was working I settled into a front and rear rest to zero the optic at 50 yards. The scope was very close from the last rifle it was on. I used two 5 shot groups to get my zero. One to find where the rifle was shooting and one to confirm that I had shifted the point of impact to match the point of aim.
Overgassed?
Three things that be came apparent right away were; felt recoil, loudness, and brass ejection. The Felt recoil on the 11.5″ was much higher then what I was used to with the 16″ Stag. The short barrel is also much louder. Both the Stag and the 11.5″ have compensators but they are very different styles. The third issue is that the brass ejection was 8 feet in front of me at 1 o’clock. The way it was explained to me by an armourer is that the AR15 should eject brass a few feet to your right, between 2:30 and 4:30. Too far forward was likely an issue with overgassing, and too far rearward was likely an issue with short stroking, or undergassing.
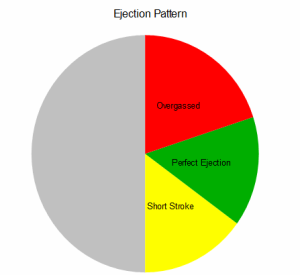
AR15 Ejection Pattern Diagram
Solutions for overgassed rifles vary wildly. Some options would be to use a full auto Bolt Carrier Group (BCG), a heavier buffer, an adjustable gas block, or there could be a problem with the extractor, or the most out of spec gas port. An out of spec gas port would require welding the gas port on the barrel closed and drilling a smaller port, or a port in a different spot. This is the most complicated and expensive option, fortunately it was also the least likely. I was all ready using a full auto bolt carrier group and the extractor on it was in good shape. I use the process of easiest and cheapest solution to hardest and most expensive to problem solve. So with the BCG being ruled out, I purchased a DPMS Counter Weight Buffer that tips the scale at 5.4 oz, 2.5 oz heavier then the buffer I was using. With the new buffer installed I am experiencing less felt recoil and the ejection pattern is about 3 feet away at the 2:30 position.
First CQB Match
In preparation for the first CQB match of the season some shooting buddies set up steel plates that mimic the shape of the figure 11 target we use at CQB matches. The practice allowed me to confirm my bullet drop at the distances we shoot from 10 to 35 yards. It also allowed me to make sure everything was operating smoothly before the first match of the season. The match was held at CFB Borden and we shoot in “service conditions” – we have all of our kit and are expected to carry up to 5 rifle magazines and 2 pistol magazines, which are reloaded between stages. We also have to transition from rifle to pistol in some stages. CQB is shot in all weather, with this match being cold and partly in the rain. The rifle ran great. I wore the first and second line gear I wrote about in January. For a side arm I carried the Remington R1 Enhanced that I showed the unboxing of previously.
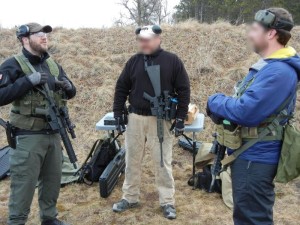
The authour at a CQB match with tne 11.5″ AR15
All the gear ran well and the Vortex PST 1-4×24 is going to make a great CQB optic. We had 55 competitors attended the match, and I placed 9th overall. The rifle did its job very well and I found some things I need to practice more, like shooting on the move and pistol head shots at 25 yards.
Final Thoughts
Assembling my own AR15 upper receiver group has been a great learning experience. I am very happy with how things have turned out. At about $800 the upper still sounds a little pricey compared to off the rack options, but this one is more or less exactly what I wanted. I also got to buy a few more tools, which is always a bonus. I’d like to add some more parts to my collection for future AR projects including some more muzzle devices, furniture, and different weight buffers. A recurring item on my to do list is load development. The rounds I used in this article are my reloaded clone of the XM193, but I think I could tune a more accurate load for the short barrel. I think it’s time to start planning a lower receiver group project so I can have 2 complete AR15 pattern rifles.
Pingback: AR15 Upper Receiver Group Series – Part 2 - Everyday Tacticool
What kind of groups do you shoot with that barrel? I am looking at getting the same one, and typically shoot 55-62gr ammo.
generic 55 grain consistently prints 5 round groups at 0.5″ at 25 yards and 3.5″ groups at 100 yards
When you does it, is,nt little bit dangerous for others?
very dangerous, leave the stunts to the pros